Made-It-Myself Automated Laser Leveling
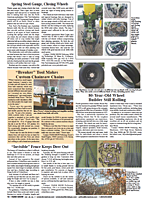
Brian Laine hacked a rear-mounted laser receiver to automatically level his 3-pt. blade. Previously, he had to turn around to watch the receiver getting its signals from a tripod-mounted rotary laser. At the same time, he had to adjust the back blade with its 3-pt. control lever.
We were redoing a horse arena that had a rock base with about 2 1/2 in. of sand that needed to be graded to a tolerance of plus or minus a 1/2 in., says Laine. I could do it manually, but it was very slow and cumbersome, and the hydraulic control wanted to move in larger increments than I wanted, making it more difficult.
Laine noted the receiver could be fitted with an optional remote display. Thinking he could tap into that to adjust the blade automatically, he contacted the manufacturer. They refused, so he tackled the job himself. He used an oscilloscope to decode the pulse train on one of the pins on the remote output. This gave him the information needed to tap into the signal and use it.
Laine certainly has more than the average electrical engineering ability and tools, but the job still took months. He had to explore and make circuits, modify equipment, make a handheld receiver and 3D print a faceplate for it.
His first step was to replace the top link on the 3-pt. with an electric 12-volt actuator that could move two tons. This required machining Heim (3-pt. connections) joints for the actuator. The 8-in. stroke and the joints gave him the length needed. He also had to install a switch on the actuator so it could be run automatically from the controller he planned to build and from the receiver.
Other components he needed to assemble included an electronic circuit board added to the actuator. It would be the central core. Cabling would run to the laser receiver, a handheld control, the actuator motor and sensor and a power source.
I wanted the handheld control to plug straight into the laser receiver instead of the actuator, says Laine. This would allow it to serve as a handheld repeater (remote display), even if the installation didnt have the actuator.
He used high-quality cabling, matched the circular connector shape on the laser receiver and used 4-pin and 7-pin, male and female connectors. His power source was a connector tied into an off/on switch on the dash also used for his sprayer attachment.
I was nervous about the power capacity of the connector, says Laine. I cabled to an XT connector at the actuator. The XT takes a lot of power and is available in hobby shops for radio-controlled rigs.
Designing the central core circuit board for the actuator was key. He used a 3D printer to create a horseshoe-shaped enclosure for the electronics that could be mounted on the actuator cylinder. The circuit board was also horseshoe-shaped.
Laine used solid-state devices (MosFETs) to control the cylinder power and to serve as the core for the cabling needed. The most complicated part of the circuit was some digital logic to prevent the handheld and the actuator switches from sending different (in/out) directional signals at the same time.
I put in a 20-amp breaker just in case and mounted the XT underneath the enclosure, says Laine.
For the handheld control, he used an off-the-shelf enclosure with a rubber boot, sized to be held in one hand. A removable panel at one end was for cable input. Laine 3D printed a replacement sized for the cable he was using. He wanted the handheld to allow him to see what the laser was doing, control the actuator and provide automated actuator control.
To accomplish all this, he had to install a microprocessor to read and decode the signal from the laser receiver. He also included a switch for power off and manual or automated control. A spring-loaded switch, as well as a 2-button switch, controls up and down. The switches remain active while in automatic mode, so the operator can override the computer.
LEDs display power on, whether the actuator is being commanded to go up or down, whether manually or automatically. Laser receiver arrows are replicated with a green LED indicating the back blade is on target or red for a need to move up or down. If the direction LED blinks, it shows a major correction is needed.
An ohmmeter built into the circuit board reads a signal from the actuator indicating extension distance.
Laine also made provisions on the circuit board and microprocessor code for saving a position, saving high and low travel limits and returning to a saved position. For simplicitys sake, he left them off the control but notes that they could be added later.
With waiting for parts and design changes, it wasnt as simple as I thought, but Ive learned a lot, says Laine.
Contact: FARM SHOW Followup, Brian Laine, 7921 Wade Rd., Arlington, Wash. 98223 (ph 425-879-2890; brianlaine@aol.com; www.lainefamily.com).
Click here to download page story appeared in.
Click here to read entire issue
Made-It-Myself Automated Laser Leveling MISCELLANEOUS EQUIPMENT Earth Movers Brian Laine hacked a rear-mounted laser receiver to automatically level his 3-pt blade Previously he had to turn around to watch the receiver getting its signals from a tripod-mounted rotary laser At the same time he had to adjust the back blade with its 3-pt control lever We were redoing a horse arena that had a rock base with about 2 1/2 in of sand that needed to be graded to a tolerance of plus or minus a 1/2 in says Laine I could do it manually but it was very slow and cumbersome and the hydraulic control wanted to move in larger increments than I wanted making it more difficult Laine noted the receiver could be fitted with an optional remote display Thinking he could tap into that to adjust the blade automatically he contacted the manufacturer They refused so he tackled the job himself He used an oscilloscope to decode the pulse train on one of the pins on the remote output This gave him the information needed to tap into the signal and use it Laine certainly has more than the average electrical engineering ability and tools but the job still took months He had to explore and make circuits modify equipment make a handheld receiver and 3D print a faceplate for it His first step was to replace the top link on the 3-pt with an electric 12-volt actuator that could move two tons This required machining Heim 3-pt connections joints for the actuator The 8-in stroke and the joints gave him the length needed He also had to install a switch on the actuator so it could be run automatically from the controller he planned to build and from the receiver Other components he needed to assemble included an electronic circuit board added to the actuator It would be the central core Cabling would run to the laser receiver a handheld control the actuator motor and sensor and a power source I wanted the handheld control to plug straight into the laser receiver instead of the actuator says Laine This would allow it to serve as a handheld repeater remote display even if the installation didnt have the actuator He used high-quality cabling matched the circular connector shape on the laser receiver and used 4-pin and 7-pin male and female connectors His power source was a connector tied into an off/on switch on the dash also used for his sprayer attachment I was nervous about the power capacity of the connector says Laine I cabled to an XT connector at the actuator The XT takes a lot of power and is available in hobby shops for radio-controlled rigs Designing the central core circuit board for the actuator was key He used a 3D printer to create a horseshoe-shaped enclosure for the electronics that could be mounted on the actuator cylinder The circuit board was also horseshoe-shaped Laine used solid-state devices MosFETs to control the cylinder power and to serve as the core for the cabling needed The most complicated part of the circuit was some digital logic to prevent the handheld and the actuator switches from sending different in/out directional signals at the same time I put in a 20-amp breaker just in case and mounted the XT underneath the enclosure says Laine For the handheld control he used an off-the-shelf enclosure with a rubber boot sized to be held in one hand A removable panel at one end was for cable input Laine 3D printed a replacement sized for the cable he was using He wanted the handheld to allow him to see what the laser was doing control the actuator and provide automated actuator control To accomplish all this he had to install a microprocessor to read and decode the signal from the laser receiver He also included a switch for power off and manual or automated control A spring-loaded switch as well as a 2-button switch controls up and down The switches remain active while in automatic mode so the operator can override the computer LEDs display power on whether the actuator is being commanded to go up or down whether manually or automatically Laser receiver arrows are replicated with a green LED indicating the back blade is on target or red for a need to move up or down If the direction LED blinks it shows a major correction is needed An ohmmeter built into the circuit board reads a signal from the actuator indicating extension distance Laine also made provisions on the circuit board and microprocessor code for saving a position saving high and low travel limits and returning to a saved position For simplicitys sake he left them off the control but notes that they could be added later With waiting for parts and design changes it wasnt as simple as I thought but Ive learned a lot says Laine Contact: FARM SHOW Followup Brian Laine 7921 Wade Rd Arlington Wash 98223 ph 425-879-2890; brianlaine@aol com; www lainefamily com
To read the rest of this story, download this issue below or click
here to register with your account number.


