2015 - Volume #39, Issue #6, Page #19
[ Sample Stories From This Issue | List of All Stories In This Issue | Print this story
| Read this issue]
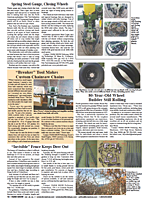
Tilt Back Cub Cadet Cab
 |
 |

The tilt back cab he built measures 48 in. long by 39 in. wide. It has doors on either side that come off.
I use the tractor with a front-mounted snowblower and blade during winter to remove snow from about 15 local senior citizens driveways and neighbors, and to mow grass during summer, says Hanscel. The tilt back design saves time because I can quickly drop the cab back out of the way onto a wheeled cart and then store it in my shop.
The rear part of the cab attaches to the tractor with a 30-in. long, 3-in. wide door hinge attached to a steel mounting plate on back of the tractor. I unhook the cab from the front, then roll it over backward onto the cart. It takes only about 5 to 10 min. to install or remove the cab, says Hanscel.
He used 1 1/2-in. dia. pvc pipe to build the cabs frame and covered it with 1/2-in. thick plywood. All wiring for the cabs lights runs through the pipe.
I have 2 LED headlights mounted on top of the cab, along with a pair of yellow LED strobe lights, says Hanscel. On back are 2 LED yellow strobe lights, 2 LED red strobe lights, a light bar, and a backup light. Also, there are 3 LED running lights on each side.
A homemade control panel equipped with toggle switches mounts inside the cab and is used to control the lights, as well as the chute and deflector on the snowblower and the blade.
The front part of the cab is held in place on both sides by a pair of 10-in. high, 1/2-in. dia. vertical steel rods attached to metal brackets that bolt onto the tractors foot steps. The rods are fitted with washers and stop collars that extend up inside the pipe frame as the cab is tilted down. The washers are the exact same size as the pipe, which keeps the cab solidly in place, says Hanscel.
A pair of nylon straps, one on each side, are bolted on inside the cab about 8 in. from the bottom. The straps run down around the vertical rods and back up to couplers.
The door hinge that the cab pivots on was purchased online at www.e-trailer.com. I needed a 30-in. hinge, but the next closest size I could buy was 5 ft. long so I cut it down, says Hanscel.
He drilled 2 holes into the bottom half of the hinge, then bolted it to a length of angle iron thats bolted to the mounting plate on back of the tractor. The upper half of the hinge bolts to the cab.
To remove the cab from the tractor, Hanscel removes the vertical metal rods and unhooks the straps, then tips the cab backward and onto the cart. To put the cab back on he re-attaches the rods, then tips the cab forward and straps it down.
He used 2 by 4s to make the cart and covered the top with furniture moving pads. The pad-covered wood surface keeps the cab from getting scratched up, says Hanscel.
The cab is fitted with 20-mil vinyl windows on all sides, except for the front window which is made of Lexan.
He made the control panel using plywood on back and metal on front. He drilled holes through the metal to mount the switches and then bolted the panel to the dash.
Hanscel also welded a 2-in. receiver hitch and drawbar onto the mounting plate. The receiver hitch is handy to move my landscape trailer around, he notes.
Contact: FARM SHOW Followup, David Hanscel, 14130 Weaver Road, Marysville, Ohio 43040 (ph 937 642-3638; dhanscel@embarqmail.com).
Click here to download page story appeared in.
Click here to read entire issue
To read the rest of this story, download this issue below or click here to register with your account number.


