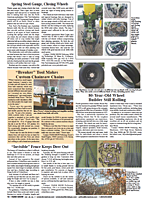
New Tire Waterer
 ✖  |
There are a lot of tire waterers around but the way this one is set up is new. You can install it where you have an existing waterer and it complies with dairy regulations because it's a non-siphoning design. Anyone with basic carpentry and welding skills can make one. And it's freeze-resistant so it's great anywhere cold weather is a factor. It needs no electrical heat, saving $15 to $45 a month in electricity.
It has a hinged wood lid. The bottom of the tire is closed by screwing a 1/4-in. steel plate to the bead with lag screws and sealed with silicone caulk. A riser pipe is made from 12-in. dia. pipe with a 1/4-in. or heavier thickness. A 3/4-in. pipe coupling is set onto the riser pipe and welded into place. The incoming water line comes up inside the riser pipe and plumbs into the 3/4-in. pipe coupling. I also drill a 2-in. cleanout drain hole on the bottom of the tire and place a drain plug into it for a stopper.
The riser pipe and valve assembly is enclosed in a box made of tongue and groove treated lumber. The box is lined with 2 in. of blue insulation board on the sides and 4 in. under the lid. The box extends below the waterline to almost the bottom in order to contain the heat from incoming water around the riser pipe and valve assembly.
The water stays open throughout the day with animals drinking from it. In the morning, I have to break the thin layer of ice with my foot. (Timothy Louwagie, 2956 Co Rd 22, Cottonwood, MN 56229 ph 507 423-6674)
Click here to download page story appeared in.
Click here to read entire issue
New Tire Waterer LIVESTOCK Feeding Equipment 24-3-34 There are a lot of tire waterers around but the way this one is set up is new. You can install it where you have an existing waterer and it complies with dairy regulations because it's a non-siphoning design. Anyone with basic carpentry and welding skills can make one. And it's freeze-resistant so it's great anywhere cold weather is a factor. It needs no electrical heat, saving $15 to $45 a month in electricity.
It has a hinged wood lid. The bottom of the tire is closed by screwing a 1/4-in. steel plate to the bead with lag screws and sealed with silicone caulk. A riser pipe is made from 12-in. dia. pipe with a 1/4-in. or heavier thickness. A 3/4-in. pipe coupling is set onto the riser pipe and welded into place. The incoming water line comes up inside the riser pipe and plumbs into the 3/4-in. pipe coupling. I also drill a 2-in. cleanout drain hole on the bottom of the tire and place a drain plug into it for a stopper.
The riser pipe and valve assembly is enclosed in a box made of tongue and groove treated lumber. The box is lined with 2 in. of blue insulation board on the sides and 4 in. under the lid. The box extends below the waterline to almost the bottom in order to contain the heat from incoming water around the riser pipe and valve assembly.
The water stays open throughout the day with animals drinking from it. In the morning, I have to break the thin layer of ice with my foot. (Timothy Louwagie, 2956 Co Rd 22, Cottonwood, MN 56229 ph 507 423-6674)
To read the rest of this story, download this issue below or click
here to register with your account number.


